Oracle Data Service Integrator Documentation > Data Services Developer's Guide
How To Configure the Retail Dataspace Sample Application for ALDSP 3.2
This topic describes how to set up the Retail Dataspace Sample Application after completing the installation of ALDSP.
Prerequisites
A prerequisite to configuring the retail dataspace sample application is to have the ALDSP Studio installed on a supported platform.
| Choose the guide for the version you are running: |
About WorkSpace Studio, Data Services Studio, and Eclipse
| WorkSpace Studio was formerly named Data Services Studio. |
This tutorial uses the version of Eclipse that is installed with ALDSP.
| The Eclipse framework often provides multiple ways of achieving same result. In many cases there is no "correct" or "better" way. In other words, there are often many paths to the same results. |
Start WorkSpace Studio
Open WorkSpace Studio using the following Windows Start menu command:
Start > All Programs > BEA Products > WorkSpace Studio 1.1
Select a Workspace
ALDSP projects are called dataspace projects. These projects in turn are located in a workspace folder.
The first step in creating a dataspace is to select a workspace.
- Use the default location:
aldsp_home\user_projects\workspaces\workSpaceStudio
- Click OK.
Selecting a Workspace
If this is the first time you have opened Studio, the WorkSpace Studio screen appears.
In the Samples section click on:
Install Retail Dataspace Sample
Retail Dataspace Server Configuration Dialog
- Click Finish. This will import the RetailDataspace project and find or create a server for the ALDSP sample domain and associate it with the project.
- Answer Yes to the question about associating your project with the ALDSP perspective.
Initial ALDSP Perspective
Start the Server
An ALDSP-enabled server is a version of WebLogic Server with additional functionality to support ALDSP deployment and runtime. The ALDSP server must be running in order to access sample data and to deploy your project.
To start your server from Studio:
- Locate the Servers window. If it isn't visible, use the following option command:
Window > Show View > Servers
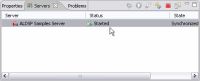
- In the Servers window locate the ALDSP Samples Server (this may be the only server listed). Notice that its status is Stopped.
- Right-click on the server name and select Start. (The start-up operation can take several minutes.) Notice the running log of server startup actions in the Console window.
Server Window
Deploy Your Projects
Each project should be deployed to validate the installation.
- Right-click on ElectronicsWS
- Choose Deploy Project from the menu. A message should appear indicating successful deployment.
- Click OK.
Also deploy the RetailDataspace project.
Create the Retail Dataspace Sample Web Application
If Workshop for WebLogic Platform 10.2 is installed into the same BEA_HOME which contains ALDSP_HOME, you can create the a web-based sample application.
| Important: Platform 10.0 MP1 contains version 10.0 of Workshop. However, the sample application required features available in Workshop 10.2. The workaround is to install the 10.2 version of Workshop for WebLogic Platform. This version is available from the download site. Current that link is: |
- To make sure the necessary dataspaces are deployed, redeploy (right-click > Deploy Project):
- ElectronicsWS and
- RetailDataspace projects
- From the WorkSpace 1.1 menu select:
File > New > Example...
- Locate the option:
Retail Dataspace Sample Web Application (WebLogic Workshop only)
- Click Next, then Finish.
- If asked if you want to open the ALDSP Perspective, click Yes.
- In the Project Explorer view, right-click on the RTLSelfService project, and choose:
Run As > Run on Server
This will initially deploy your projects and then open the sample Avitek login page.
Avitek Login Page
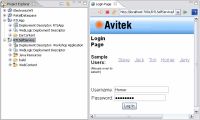
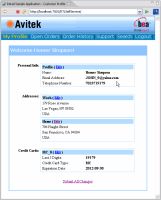
- Mouse over one of the names and log in. After a few moments information about the fictitious customer will appear.
Avitek Welcome Page